M-19 Updates
LATEST UPDATES!
February 14, 2023 Update
Marvin Barnard died on Valentine's Day, 2004. Nineteen years later, I'm writing to say that I'm attempting to memorialize his work
through the construction and eventual flight of my Flying Squirrel. His plane was completed in 1996 and certified by the FAA in April
of 1997. After that, it was flown for a few years by Justin Drake and then returned to the family and stored. In November of 2013 the
FAA deregistered N7238B due to non-renewal of its registration. Having recovered the airplane from its place in storage, John Bouyea
and I wondered about reserving that registration number with the possibility of restoring the airplane to airworthiness, but it soon
became evident that due to corrosion of metal fittings, delamination of the fiberglass skin, and possible water damage to the wing
spars, the plane should never be allowed to fly again.
Serendipitously, I received an email from a Cessna owner completely out of the blue asking about the registration number of my Squirrel,
N2069Z, inquiring if I might consider giving it up since his Cessna had worn that number back when he first started flying and before
he owned the plane. It suddenly dawned on me that I could give up my number and then use the reserved 7238B number on my own plane,
allowing Marvin's dream and his spirit to continue flying when my plane is completed and flown. The process has taken over a year to
work its way through the backlogged FAA registry office, but in another moment of serendipity, the approval came through almost exactly
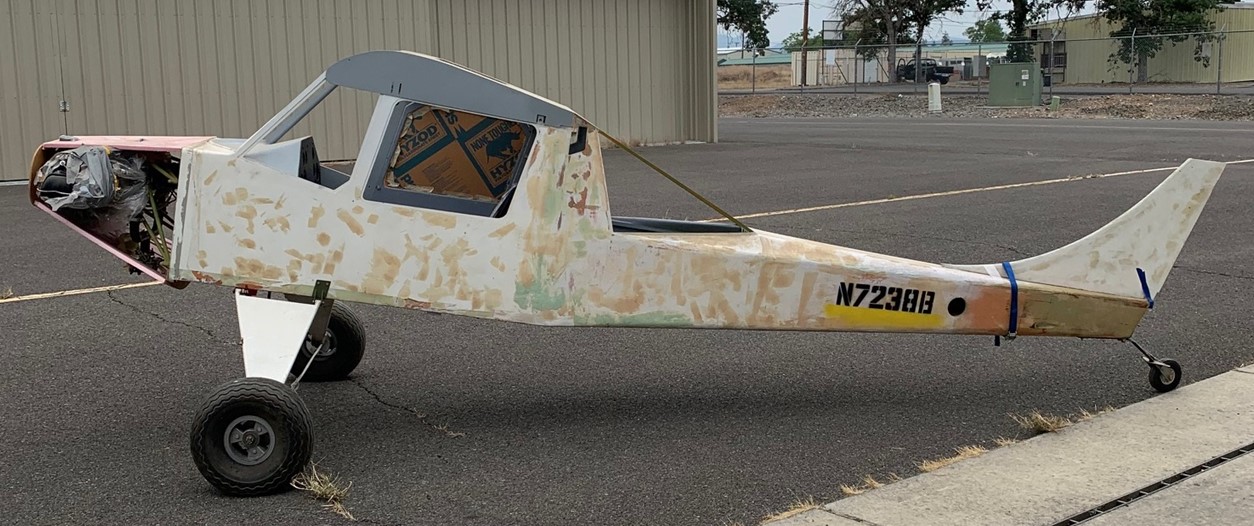
on Valentine's Day 2023. As a requirement for compliance, the FAA called for me to put the new registration markings on my airplane
and I have done so, although for now it's just some black spray paint applied using hobby store letter templates. N7238B will take to
the skies again, one way or the other!
April 2, 2001 Update
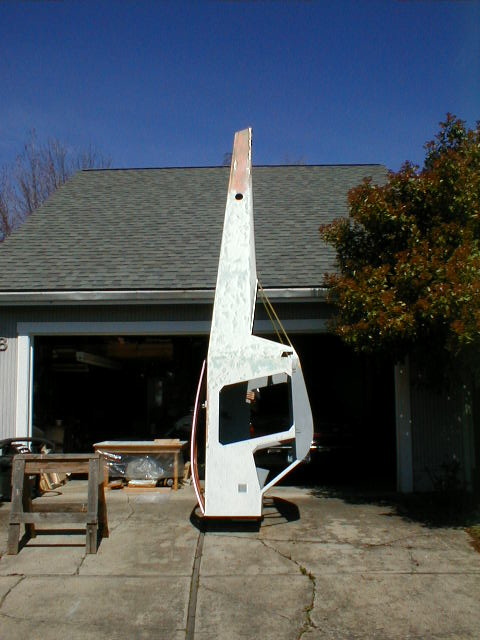
Well, this is what the thing looks like balancing on a set of bathroom scales (you *can* see the bathroom scales under there, can't you?)
It weighs 85 lbs. as you see it there. Belly panel is underway; interior fill/sand/prime nearly complete. Yes, this is a milestone in
the construction, a bit more than 2 years since I first cut wood on the project.
March 11, 2001 Update
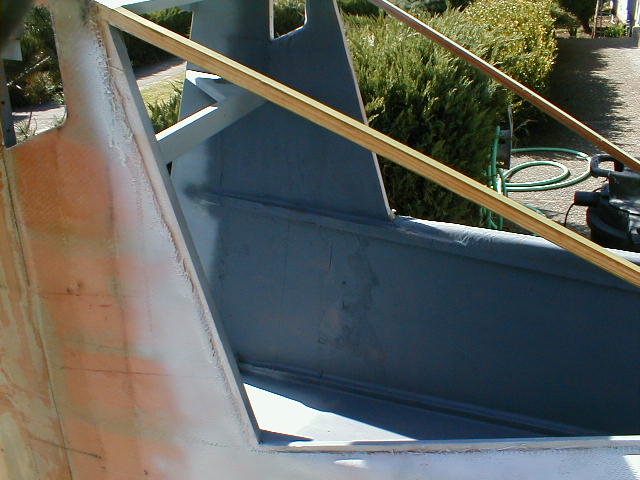
This is what the rough, unfinished joint between the cabin and empennage looks like after laying up a 4" and then an 8" wide strip of glass
over the seam, both inside and out. I carried the reinforcement all the way up to the roof; plans only require it up to the level of the
top longeron. The belly has yet to be added, so the bottom edge of the cabin was left unprimed and ready to wrap the belly glass overlap
onto it. Also very noticeable in this photo are the differences in the lines of my windows as compared to the prototype's.
 Here's the inside of the rough, unfinished (but primed) seam. I typically rough-sand with 60 grit or so, then prime, then rough-sand again
with 60 grit, to show up the low spots. The next rounds of sanding are with 120 grit. Visible in this photo are the (unfinished) edges of
the insets I'm using for my windows. The prototype's windows are screwed directly to the outside of the frames, but I've provided rabbets
to make the windows nearly flush with the outside skin.
Here's the inside of the rough, unfinished (but primed) seam. I typically rough-sand with 60 grit or so, then prime, then rough-sand again
with 60 grit, to show up the low spots. The next rounds of sanding are with 120 grit. Visible in this photo are the (unfinished) edges of
the insets I'm using for my windows. The prototype's windows are screwed directly to the outside of the frames, but I've provided rabbets
to make the windows nearly flush with the outside skin.
 Now compare this with the first shot. This side has been filled, sanded, and primed. It's now smoother than the raw, unfinished joint,
but you can sure see lots of lumpy places, dips, pinholes, and open cloth weave. It will take about another 3 rounds of filling, sanding, and
priming to get it ready for smooth prime or paint. Also noticeable in this shot are my cutouts for the aileron bellcranks. I made the cutouts
a bit more to the size and shape actually needed for clearance, rather than just making large half-moons as called for in the plans. I intend
to find some sort of rubber boots to cover the holes, too (maybe something like parking brake lever boots from a VW or something). I'd like to
keep air, rain, and noise out of the cabin.
Now compare this with the first shot. This side has been filled, sanded, and primed. It's now smoother than the raw, unfinished joint,
but you can sure see lots of lumpy places, dips, pinholes, and open cloth weave. It will take about another 3 rounds of filling, sanding, and
priming to get it ready for smooth prime or paint. Also noticeable in this shot are my cutouts for the aileron bellcranks. I made the cutouts
a bit more to the size and shape actually needed for clearance, rather than just making large half-moons as called for in the plans. I intend
to find some sort of rubber boots to cover the holes, too (maybe something like parking brake lever boots from a VW or something). I'd like to
keep air, rain, and noise out of the cabin.
 Another view of that "kinda finished" seam. I don't like the way the contours of my fuselage turned out. I wanted them to be rounder, but
they ended up somewhat angular. Oh, well; I'll get it right on the next one I build ;o)
Another view of that "kinda finished" seam. I don't like the way the contours of my fuselage turned out. I wanted them to be rounder, but
they ended up somewhat angular. Oh, well; I'll get it right on the next one I build ;o)
December 3, 2000 Updates
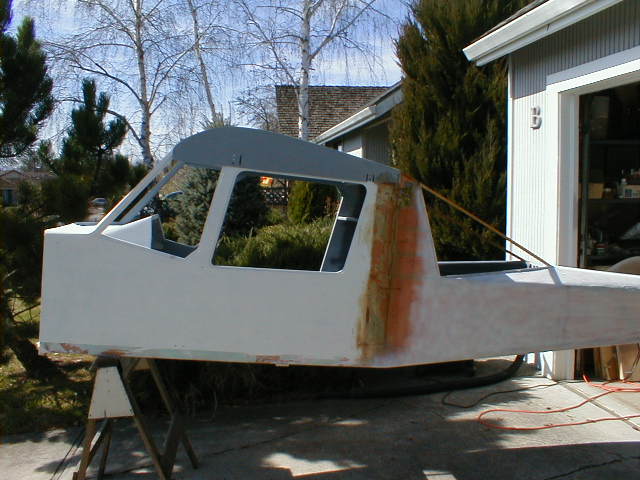
Aft section of the cabin roof finished, sanded, primed. Rear window framing in place. I've framed my rear window differently from the prototype,
and am thinking of installing a hinge across the leading edge of it to allow opening it for access to the baggage area. I've also smoothed,
glassed, and primed the joint in the cabin floor where the cabin and empennage were joined (two layers of glass). Still working my way up the sides.
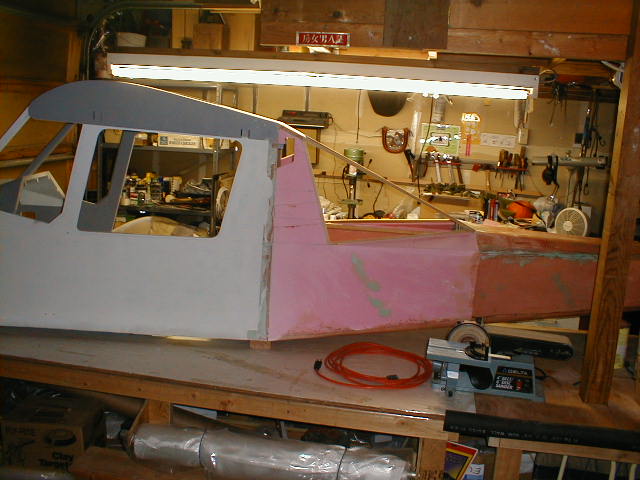 Side view of how I've framed the rear windows. Foam has been built up and sanded, but not filled or smoothed yet. And of course I haven't yet
glassed over the cabin/empennage seam here.
Side view of how I've framed the rear windows. Foam has been built up and sanded, but not filled or smoothed yet. And of course I haven't yet
glassed over the cabin/empennage seam here.
November 21, 2000 Updates
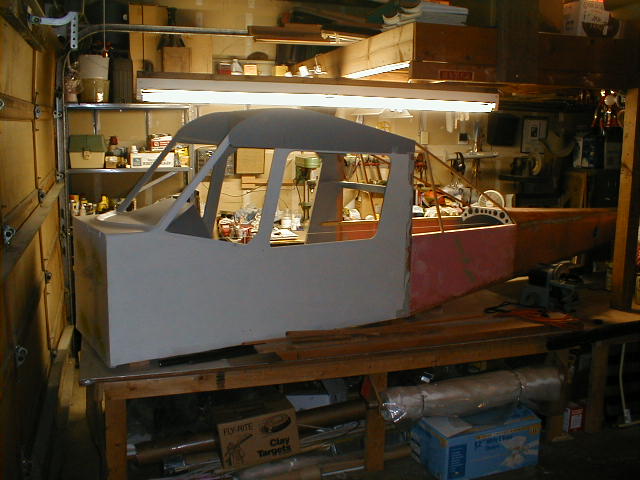
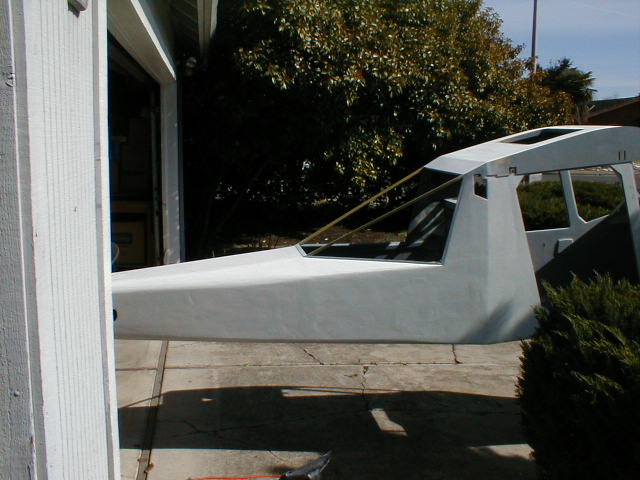
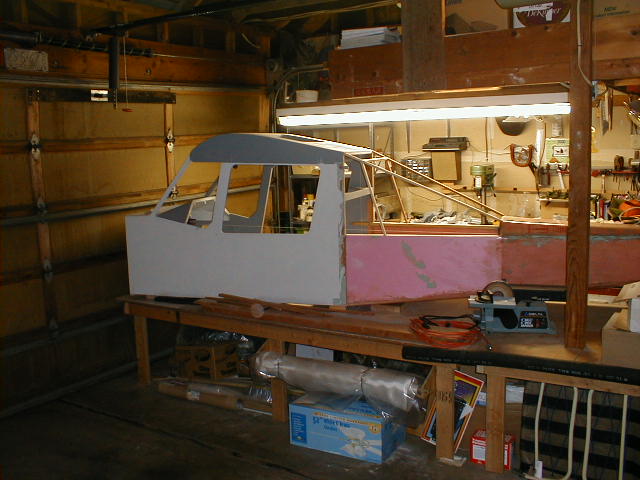
Yes, here is the M-19, cabin joined to empennage, stuffed into my workspace (my half of the garage). My wife called it "the kayak bumping into
the back of the choo choo train". The rear window framing is cut and fitted, but not yet glued in place in these photos. I have changed the lines
of my rear window "greenhouse" from that of Marvin's prototype, as you will notice in this and following photos.
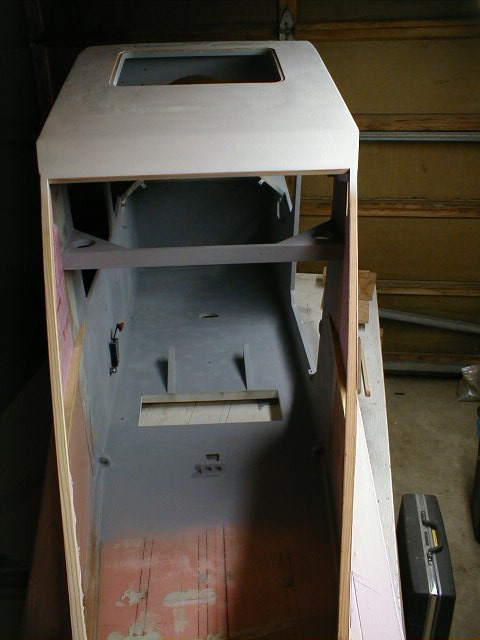
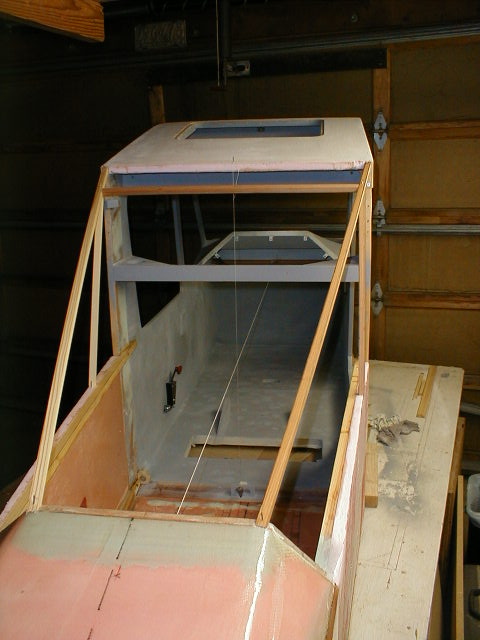 Here is the view looking in through the rear window, showing how I'm framing the greenhouse. Across the top is where an aft section of the cabin
roof goes; it's not called out in the manual, but is obvious in photos of Marvin's plane. I've added a framing crossmember there, to mount the
leading edge of the rear window onto. I've also changed the lines of the two main runners, where they now tie into my bulkhead rather than down
onto the longerons. When I add the foam and glass, it will become more obvious what I've done and why. From this photo, however, you may note
that my rear window will be flat, while Marvin's has a flat top and sloped (bent) sides. You can also see the strings I've used for leveling and
truing the empennage for joining to the cabin. A vertical string (very thin; barely visible) in the center of the rear opening of the cabin has a
pyramid fishing sinker as a plumb-bob, right where the floor of the cabin joins the floor of the empennage. The two strings centered up perfectly
before I joined the halves.
Here is the view looking in through the rear window, showing how I'm framing the greenhouse. Across the top is where an aft section of the cabin
roof goes; it's not called out in the manual, but is obvious in photos of Marvin's plane. I've added a framing crossmember there, to mount the
leading edge of the rear window onto. I've also changed the lines of the two main runners, where they now tie into my bulkhead rather than down
onto the longerons. When I add the foam and glass, it will become more obvious what I've done and why. From this photo, however, you may note
that my rear window will be flat, while Marvin's has a flat top and sloped (bent) sides. You can also see the strings I've used for leveling and
truing the empennage for joining to the cabin. A vertical string (very thin; barely visible) in the center of the rear opening of the cabin has a
pyramid fishing sinker as a plumb-bob, right where the floor of the cabin joins the floor of the empennage. The two strings centered up perfectly
before I joined the halves.
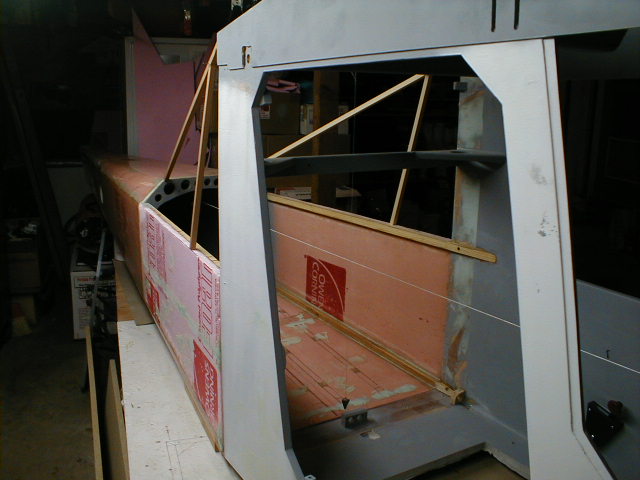 A view looking in the door. In this shot, one of the rudder cable fairlead blocks is visible just forward of the cabin/empennage joint at the floor.
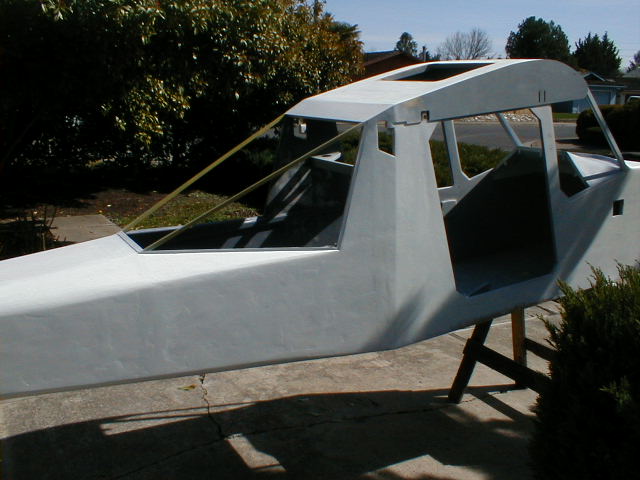
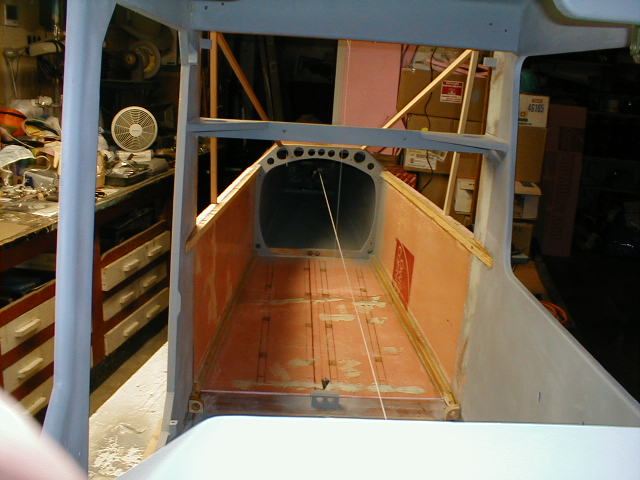 A view looking in through the windshield. The centering strings and my fishing sinker "plumb-bob" are visible, as is the rudder cable and elevator
cable fairlead block. Rear window framing lines are apparent.
A view looking in through the windshield. The centering strings and my fishing sinker "plumb-bob" are visible, as is the rudder cable and elevator
cable fairlead block. Rear window framing lines are apparent.
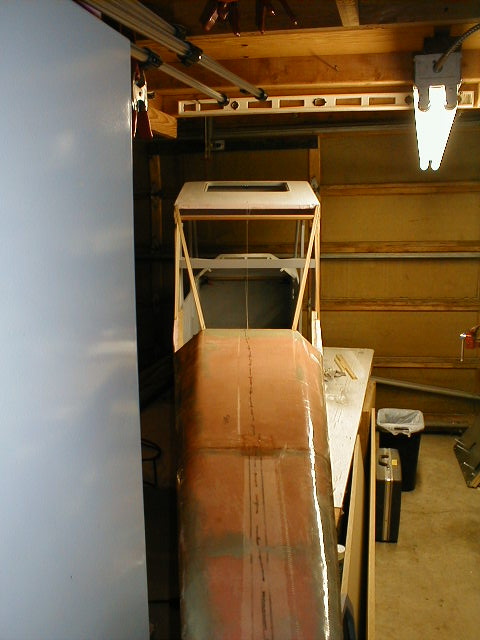 View down the tailcone. What is most evident here (to me) is that the top line of my top cowl, or the top edge of where the instrument panel will be,
isn't perfectly level. I knew that the minute I finished glassing it, but didn't want to tear it out and fix it. I had to make the instrument panel
slightly skewed on top to match this, but I've figured out a way to hide it. Wait till it's done to find out how ;o)
View down the tailcone. What is most evident here (to me) is that the top line of my top cowl, or the top edge of where the instrument panel will be,
isn't perfectly level. I knew that the minute I finished glassing it, but didn't want to tear it out and fix it. I had to make the instrument panel
slightly skewed on top to match this, but I've figured out a way to hide it. Wait till it's done to find out how ;o)
If you're not building yet,.........................why not?
Return to My Flying Squirrel Home Page